 Description: This lesson serves as a culminating activity to a ten day unit of Landforms and Natural Resources. Landforms are around us everywhere and quietly affect our everyday lives. Knowledge of natural resources provides both awareness and protection of our precious planet. This lesson will also cover a family involvement component in which parents will be asked to provide their child with recyclable items to use in the activity.
Rationale: Throughout the Landforms and Natural Resources unit, the students have learned about types of landforms in addition to various resources and how we reuse and sometimes abuse these resources. Landforms and natural resources are crucial topics for second graders to be introduced to as they will always be a part of the greater world beyond the classroom. This culminating activity marries the two concepts: Landforms and Natural Resources in a creative and memorable way. Students will have to use their creativity in addition to what they have learned throughout the unit.
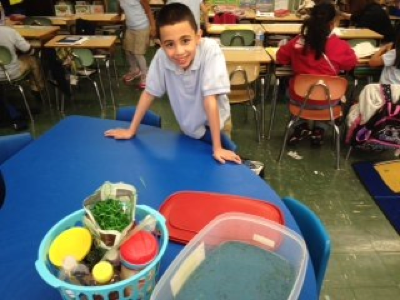
Prior Knowledge: As this lesson is a culminating lesson, students should apply what they have learned in the entirety of the unit, the nine days prior. To complete this activity, they must first understand natural resources and how we can conserve natural resources by reusing and recycling materials. They must know which materials qualify as recyclable materials that they can use in this activity. Students may show their misconceptions by bringing in items that are not recyclable. In this case we will sort through the recyclable and non-recyclable items as a class. To complete the activity in class, students must know some of the distinctions and characteristics of the landform they have been given as they will be asked to model these landforms out of the materials they have collected. We believe getting to construct their own landforms; something that they cannot necessarily do in the real world, will certainly capture their imaginations.
New Jersey Core Curriculum Content Standards
6.6.2.B.1. Places and Regions
Describe the physical features of places and regions as on a simple scale
6.6.2.E.1 Environment and Society
Describe the role of resources such as air, land, water, and plants in everyday life.
6.6.2.E.3 Environment and Society
Act on a small scale, personalized environmental issues as littering and recycling and explain how such actions are important
Objectives
Students will be able to construct a landform displaying its defining characteristics
Assessments
Students build their landform with the defining characteristics we have discussed
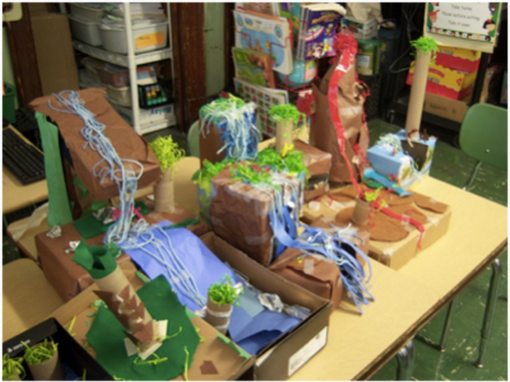
Hook: Hold up a funnel (cone shape) made out of newspaper for the students to see. Ask students, “What does this look like to you?” Have about 5 students share their answers and then say, “Hmm, This looks to me like a mountain peak. See the pointed shape when I turn it this way?” Today we are going to use the materials you have all brought in and our wonderful imaginations to make our own landforms.
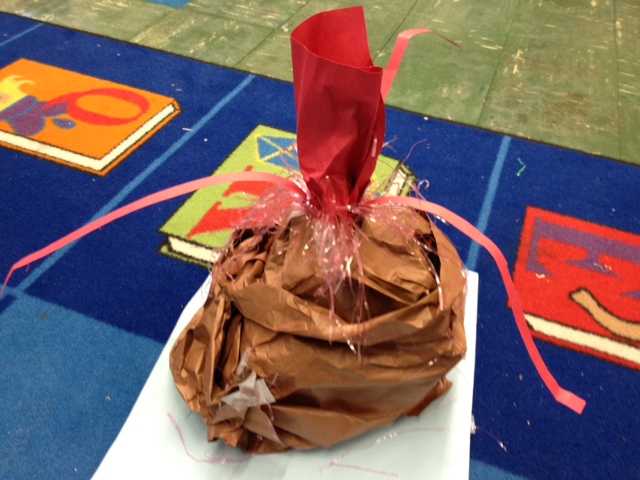
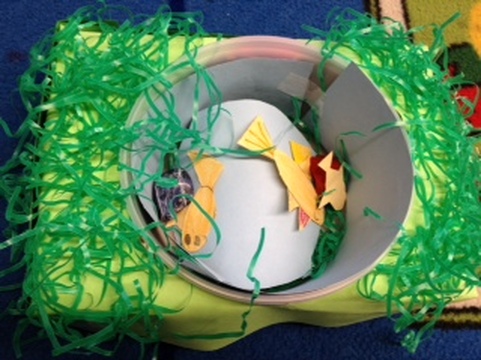
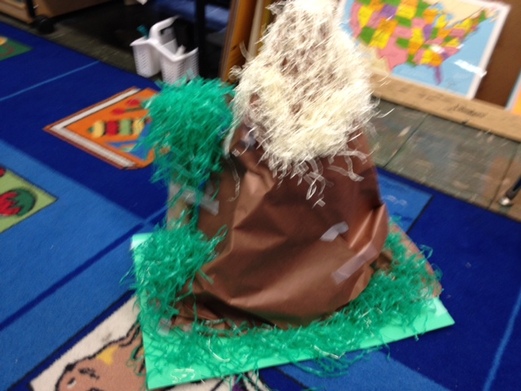
Activities: Students will be called back to the carpet to view the “hook”. We will do our “hook” as explained above. We will review our characteristics of landforms as it has now been a few days since the students have worked with them directly. We will review by using the flashcards we have made as a class in Day One’s lesson. Next we will explain to children the task: Working in groups of three, you will use the recyclables we have brought in to build the landform we assign you. We will spend a few minutes on simply the management of this activity. We will read off the groups and give each group a piece of paper with their assigned landform. One person will be in charge of getting tools such as scissors, glue, tape and colored paper. We will designate this person and the place in the room where they will work. After we have entertained questions and fully explained, we will then dismiss groups from the carpet. We will help students with the construction and cue them with Mrs. Masterson’s bell when we want them to finish up building. We will cue them 5 minutes after that to have them clean up their workspace. We will then pass out a worksheet with three questions on it: 1.What is the name of the landform you made? List some characteristics, 2. What items did you use to make it? 3. Why is it important to reduce, reuse, and recycle? We will have groups present the landform they made by answering the questions provided on the worksheet. We will display these landforms in the back of the room to “celebrate” them post-lesson.
Materials: Recyclable materials such as milk jugs, newspaper, soup cans, cereal boxes etc., glue, tape, colored paper, scissors, the landform cards from Day One, newspaper funnel for hook, worksheets
Questions:
What does a (landform) look like?
Can you list some of the characteristics of this landform?
Can you recycle (item)?
Can you distinguish between a lake and an ocean?
What are the differences between a hill and a mountain?
Can you name a famous mountain range?
Can you name a landform surrounded by water?
What are some ‘recyclables’ that are natural resources?
What is the problem with not conserving and reusing materials?
Can you design something from these recyclables that looks like a landform?
Closure: To close this lesson as well as the unit, we will have each group present the landform they have constructed and talk about the materials they used to construct it. Most importantly we will have students explain the importance of recycling and reusing to help the planet. This will be a final review of characteristics of landforms as well as using recyclable materials to conserve natural resources. In addition, Mrs. Masterson has informed us that we will use their projects as our exhibit in the science fair!
Individualization: This activity is very individualized in that it allows every student to express their creativity in their own way. However, if a student is feeling too shy to speak in front of the class when presenting, we will allow that student to be the recorder for the group. That student will record the answers to the three questions that the other group members will then share with the class. If students are having trouble we will give them the card that displays the characteristics of the landform or perhaps give them an idea or two to get them started. Early finishers will help clean up materials and can do“recall” writing about the steps to how they constructed their landform.
Follow-up Activities: Although this activity is the culminating lesson of the unit, students’ knowledge of landforms and natural resources can be revisited when it is Earth Day on April 22!
Name__________________________
1. What is the landform? What are some of its characteristics?
2. What did you use to make your landform? (Did you recycle or reuse anything?)
3. Why do you think conserving, reusing and recycling are important to do?
 Description: This lesson discusses conserving natural resources in terms of reuse and recycling of materials. When we reuse something, we use it for a second or maybe even more times. We can use plastic Tupperware containers multiple times by washing them after each use or dish towels instead of paper towels. Reusing something could also mean we can use soup cans to for a pencil cup or a milk jug to make a bird house. Recycling is sorting our waste into appropriate containers so that certain materials such as plastic, paper, aluminum and glass can be processed and used again. It is important to both reuse and recycle in order to preserve our natural resources.
Rationale: As students have learned about natural resources and the environment the preceding days, now they must learn to further protect our resources. Students must learn the proper way to dispose of waste in a non wasteful way. This means they must know how they can reuse and recycle in order to do their part in protecting the environment. Awareness of littering, pollution, recycling and reuse will make students better citizens to their communities and their environment. It is important to instill this awareness at a young age so that it remains as a habit throughout adulthood.
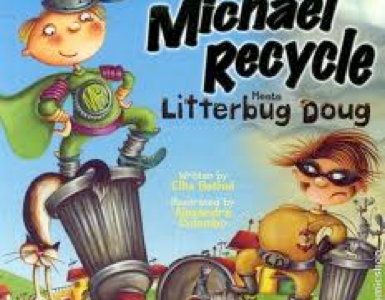
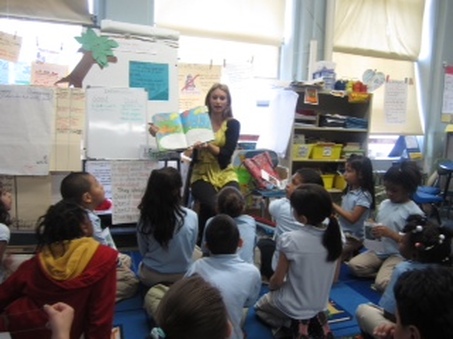
Prior Knowledge: Students must know the word “pollution” from prior lessons and know that this term is waste products that muddy and ruin an environment. Students should have an idea that recycling is good and that being wasteful is bad. It would be helpful for students to have an idea of what kind of materials they can recycle. A misconception that students may have about recycling is that they can only recycle paper. (In Robbins school, the classroom trash cans are only marked as trash and paper.) They may also come in with the misconception that recycling is difficult or time consuming to do. The read aloud we are going to do with the book Michael Recycle will certainly capture students’ imaginations. The book is about the “green superhero Michael Recycle” and it is very whimsical with its illustrations and rhyming verses. We think it will take their imaginations right into Michael’s world in the land of “Aberdoo-Rimey”. Their imaginations will further be captured when we ask them to think of a new use for a particular item. Students will have to use their imaginations in order to reuse.
New Jersey Core Curriculum Content Standards:
6.6.2.E.1 Environment and Society
Describe the role of resources such as air, land, water, and plants in everyday life.
6.6.2.E.3 Environment and Society
Act on a small scale, personalized environmental issues as littering and recycling and explain how such actions are important
Objectives
Students will be able to sort materials into recyclables and trash
Assessments
Students will properly sort items we give them into the proper container- plastic, glass, metal, paper or trash
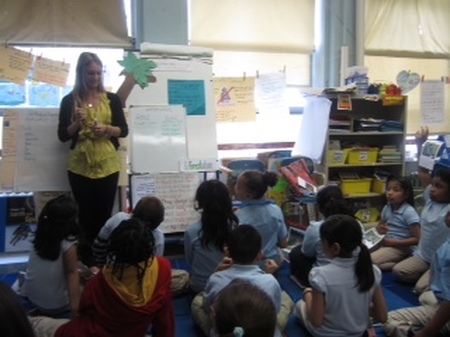
Hook: We will use the story Michael Recycle Meets Litterbug Doug by Ellie Bethel as our introduction to this lesson. We will say, “Put your finger on your nose if you have heard the wordrecycle before. We will call on a few volunteers to see if they know. We will say, “Put your finger on your nose if you have ever heard the word litter or litterbug.” We will demonstrate littering and say, “Littering is throwing trash onto the ground no matter how little or big the piece of trash is. Sometimes we call people that litter, litterbugs.” We will read the book Michael Recycle quickly interjecting about difficult words such as culprit, crusader, reeking, and excelled.
Activities: Students will be called back to the carpet to view the “hook”. We will do our “hook” as explained above. We will read “Michael’s Green Tips” in the back of the story by calling up seven students to each read one of the tips from the book. We will discuss or entertain small questions about being green at this time. We will then say, “The best thing you can do for the environment is to recycle. Can anyone name a material that can be recycled?” We may have to help them out by asking if they have seen their parents recycle. We can discuss our own experiences recycling in order for students to understand that we can recycle plastic, paper, metals, and glass. All of the rest is trash. We will briefly explain how when we recycle materials, the sanitation workers collect them from our houses and they send them to a place where they can be cleaned and made into more of that material. We will talk about how a squished up old water bottle gets cleaned and then melted to make a brand new water bottle. Next we will start our sorting activity. We will give each student an item and they must decide which bin to recycle it in or if it is trash.
Materials: Michael Recycle book(s), at least 1 item for everyone in the class (some recyclables, some trash), five bins marked plastic, paper, metals and glass and trash.
Questions:
What is recycling? What does it mean to reuse something? What is litter, or littering?
Can you think of an instance where you may have seen someone litter?
What is the difference between recycling something and throwing it in the trash?
Can you explain the process of what happens when something is recycled properly?
What are some of the characteristics of plastic recyclables? Metal recyclables? Etc.
Is it true that I can put a metal can in with the glass recyclables and it can all get recycled?
Can you think of a new way you can reuse a plastic water bottle, can etc.
Do you think recycling protects natural resources and our environment? Why or why not
Closure: To close this lesson we will read another Michael Recycle book and along the way, point out items and materials and ask the students how they would recycle them in order to further reinforce the concept of recycling.
Individualization: This activity is very individualized in that it allows every student to express their creativity in their own way when they do the Reuse activity. We believe this lesson appeals to visual learners through the Michael Recycle books and the recycling activity. It also appeals to kinesthetic learners as students will be able to get up and move around when recycling their items and when swapping items in the Reuse activity. It will be a hands-on experience for all as the items are tangible and manipulative. Early finishers make take a look at one of the Michael Recycle books on their own and look at the recyclable items in the unique illustrations. Even Michael’s costume is made out of recyclables!
Follow-up Activities: The next lesson will be the culminating activity. We will put together what students have learned about landforms and resources into one big activity called “Making Mountains out of Milk Jugs”.
 Deforestation is the cutting down of trees and forests in order to industrialize or build. Trees are an invaluable natural resource so when deforestation occurs in excess, the detriments drastically outweigh the novelty of having a brand new shopping mall. Trees are a natural resource that we must conserve and value. They are considered a renewable resource but this is only given that they are replanted and not used at a more rapid rate. Click here to see lesson plan! All materials included.
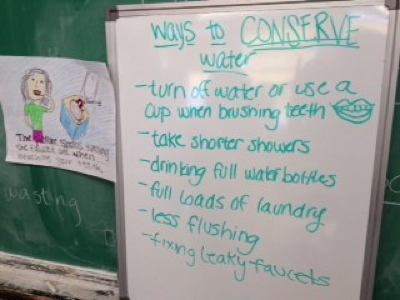 Description: This lesson will cover water as a natural resource and the importance of its conservation. Water is used every day such as when showering, brushing teeth, washing hands, cooking meals, drinking, flushing the toilet, washing the car etc to prove it is an important natural resource to every student. We will demonstrate how much water is wasted when a faucet has a leak eventually to reveal the ways individuals can conserve water including taking shorter showers, turning off the water when brushing teeth etc.
Rationale: Students must be aware of water as a natural resource as it is a truly precious one that they use multiple times per day in some way or another. Only three percent of all the Earth’s water is considered fresh water so, this small percentage must be treated with care. Students must have the awareness of water as a delicate natural resource so that they use it mindfully and conserve as much as they can. This makes them not only learners but conscientious citizens.
Prior Knowledge: Students must have the prior knowledge that water is a natural resource. (They will be learning this in lessons prior). They must be able to brainstorm ways that they use water in their everyday lives. Students probably hold on to the misconception that water can never run out and deplete. They see their faucets running every time they need to use water to brush their teeth or shower etc. It is no surprise that they come in with this misconception. Another misconception they may have is that we will never run out of water because the ocean is so vast. While it is true that the ocean will always contain a lot of water, oceans contain salt water which we do not use like we do fresh water. In this lesson, the students’ imaginations will be captured when we calculate how many gallons of water our class uses in a day. They will be amazed by this number and hopefully be able to imagine how much water will be used if considering all of the classrooms in the school, in the US etc.
New Jersey Core Curriculum Content Standards:
6.5.2.A.2 Economic Literacy
Explain how products individuals eat, wear, and use impact their health, safety, and the environment.
6.6.2.E.3 Environment and Society
Act on a small scale, personalized environmental issues as littering and recycling and explain how such actions are important.
Objectives
Students will be able to examine the ways they use water every day
Students will be able to identify ways in which they can conserve water
Assessments
Students will list ways as a class
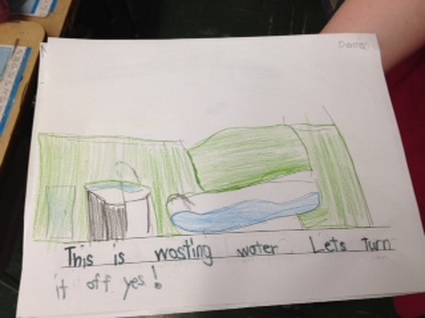
Students will draw pictures of conservation and write a short caption for their pictures
Hook: We will say, What were some of the ways that you and your family use water?” We will ask many students to share and create a running list of these ways on the board.
Activities: We will do the hook activity and then go into the main demonstration. We will demonstrate the “Leaky Faucet” activity for the class. We will split the class in half and do two demonstrations of this experiment so that all students can view the experiment and ask questions. We will say, “Put your thumb up if you have ever seen a leaky faucet? Maybe the water fountain leaks, you didn’t turn the faucet all the way off on your bathroom sink at home etc. Today we are going to show you a neat experiment that will let us be able to see how much water is wasted in just a minute from letting a faucet leak.” We will show our students our materials: A test tube, timer, a funnel, a coffee filter and a bottle of water. We will then tell them how we set up our simulated faucet experiment. The set up for the faucet is that the funnel is in the test tube and the coffee filter is in the bottom of the funnel to make the water come out slower. We will tell the students to watch what happens inside the test tube. We will time the leak for one minute and the measurements on the test tube will tell us how much water was wasted. We will choose one student per group to time the minute leak. We will ask the questions (listed below) before and during the experiment. After the demonstrations, we will call all of the students back to the carpet based on their behavior and good listening skills during the experiment. We will make another list of the ways we waste water every day, leaky faucets being just one of them. Most importantly, we will brainstorm ways we can conserve water. We will give them the instructions for the next activity and send them back to their desks for the final activity. At their desks, students will be asked to illustrate a way they can conserve water whether it is taking shorter showers, fixing faucet leaks etc. and write a short caption for their picture. When telling students the instructions, we will present an example so they can better visualize what they must do. Students will work on these illustrations until we ring the bell to say Finish Up and Clean Up. We will display these illustrations on our “You Don’t Know What You’ve Got Til It’s Gone” mural.
Materials: test tube, funnel, coffee filter, bottle of water, timer, white paper, crayons or markers
Questions:
What do you see happening in the test tube? What is the problem here?
Can you estimate how much water you think will drip from the faucet?
What happened after the faucet started leaking?
What do you think was the point of this experiment? Why did we show this demonstration to you?
Can you think of another instance where water is wasted?
What are some of the problems of wasting water?
Why do you think it is important to conserve water?
What can you do to conserve water in your home?
Do you think conserving water is important? Why or Why not?
Examples: We will provide students a sample illustration with a caption so they know exactly what we would like for them to do. This will be presented when we are giving the instructions for the activity.
Closure: For our closure, we will have three of the students with the best illustrations and captions come up and share. We will then have all of the students bring their illustrations to the mural so that we can staple them on to the mural.
Individualization: This experiment of the leaky faucet will be extremely beneficial to the visual learners. By asking questions during and after the experiment, we will be able to reach auditory learners. The final activity with the illustration and caption has been individualized as well. It is a great alternative to a larger writing assignment as sometimes this type of assignment can be daunting to the lower learners in our class.
Follow-up Activities: As a follow up, we will explore more about resource conservation and especially focus on reusing and recycling to protect natural resources.
 Description: This lesson is about pollution and more specifically, water pollutants. It is a demonstration of Freddy the Fish done by Water Watch at The College of New Jersey. The demonstration will simulate the pollution of water and students will be asked to reflect on how Freddy Fish feels about his polluted habitat. Rationale: Students must learn about water as a natural resource as it is an extremely crucial one to protect. We are trying to instill in students the attitude that pollution is extremely bad for the environment and that each one of them must be conscious about protecting water and the animals that live in the water as they are vital natural resources. In addition, this lesson will also promote the concept of “putting themselves in someone else’s shoes”, in this case Freddy’s. Prior Knowledge: Students must have some prior knowledge of ocean habitats or what animals live in the ocean. They must know that water is a natural resource as both humans and animals need it to survive. Students may come with the misconception that all water is clean. Assumedly the water they drink and shower with is clean and clear so they may assume that all water is clean. Students will be able to grasp the concepts of this demonstration because at this time, second graders are very empathetic. Their imaginations will be captured as they will almost automatically put themselves in Freddy’s “shoes”. They will feel sorry for Freddy living in the bad conditions and understand how bad pollutants are for the water and other environments. New Jersey Core Curriculum Content Standards 6.6.2 E.1 Environment and Society Describe the role of resources such as air, land, water, and plants in everyday life. 6.6.2 E.3 Environment and Society Act on small-scale, personalized environmental issues such as littering and recycling, and explain why such actions are important. Objectives Students will be able to recognize some basic effects of pollution Students will be able to define pollution Students will be able to list ways to prevent pollution Assessments Check worksheet for correct depiction of before and after water Check worksheet- definition fill in section Check worksheet- circle correct behaviors Hook: Show students the following picture: Model about using picture clues, “Hmm I see a young boy in the middle here and it looks to me like he’s standing in the middle of a lot of trash and garbage”. Ask students, “Do you think this looks like a nice place to live?” and “Do you think this is a safe place for this young boy to be?” All of this garbage in this picture is called pollution. We are going to learn about pollution today and especially how it affects my cute little friend, Freddy the Fish. Activities and Questions Combined: We will call all of the students back to the carpet based on behavior at their desks. We will first do our hook to catch the students’ attention and mention the word “pollution”. We will ask the students, “Does anyone know where our friend Freddy lives?” Students should say, “ocean”, “river” or “lake”. We will say, “These landforms are made up of a very important natural resource that we talked about yesterday boys and girls. Who can tell me what it is?” (Answer: water) and “Can anyone name another natural resource that is in the ocean?” (Answer: animals). We will say, “I mentioned a very important word before, put your thumb up if you heard me say the word ‘pollution’?” “How did I use that word?” “Pollution is waste like trash and garbage that harms an environment.” “Let’s see how our friend Freddy feels about pollution in his habitat”. Script: Freddie has lived in this clean part of the river his whole life. But now he wants to go on an adventure downstream. · He passes a farm. It begins to rain, and soil runs down into the water. (dump soil into the water) “How is Freddie feeling? Why do you think that?” · He swims a little more and passes a parking lot. Some cars are leaking oil. “Where do you think the oil goes?” The rain washes the oil into the river. (pour pancake syrup into the bottle). “How is Freddy doing? What do you think this feels like?” · Freddy swims some more and then swims near schools where some kids don’t throw their garbage in the garbage can. The wind blows and the rain carries the garbage into the river. (pour torn paper inside) “How is Freddy feeling now? Why do you think that?” · Freddy then swims past a bunch of factories. The factories don’t follow the rules and they dump chemicals and more garbage into the river, polluting the water…. (drop in food coloring etc.) · “Do you think Freddy can breathe?” · “Is Freddie Happy or Sad?” · “Would you like to be swimming with Freddie in this water?” Give students the worksheets and send them back to their desks one at a time by who is behaving quietest. Students will fill in the worksheet attached. Closure: We will end the lesson by reviewing the worksheet and concentrating on what students can do to keep the environment pollution free. We will review the ones provided on the worksheet and also open it up to the students to see if they came up with any other ways on their own. Individualization: For this lesson, the biggest concern will be good behavior and listening skills. For individuals that cannot handle the demonstration maturely, they will be asked to move back to their desks to watch the demonstration. The Freddy Fish demonstration is very visual so it will greatly benefit visual learners. It will touch kinesthetic learners as we ask some select well behaved students to help “pollute” the water when we are demonstrating. Early finishers should color their illustrations on their worksheet page. Follow-up Activities: The following lesson is about conservation of water as it is a vital natural resource for Freddy and all other living things. Worksheet
 Topic: The topic of this lesson will be renewable and non-renewable resources. We will focus on getting the students to understand what each is and what the differences are between these 2 kinds of natural resources. It will be important for the students to understand that both are natural resources, but that the difference is that one (renewable) can be replaced, while the other (non-renewable) cannot be replaced.
Rationale: This lesson is extremely important in meeting our goal of having students understand the importance of the environment. It is one thing for the students to know what natural resources are, but it is even more significant for them to realize why they are so important. By learning about renewable vs. non-renewable resources, the students will start to recognize that these resources are so important because, once we use them all up, we cannot replace them. Comprehending that there is a difference between a renewable resource and a non-renewable resource will help them to be more conscious of saving these resources and not wasting them.
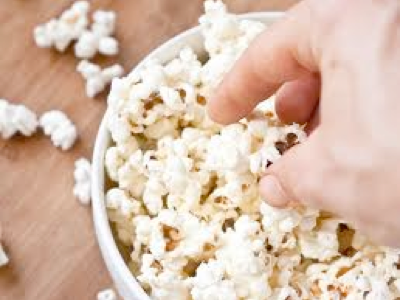
Prior Knowledge: For this lesson, the students will need to have a strong grasp on what a natural resource is. If they do not understand what a natural resource is, they will most likely struggle with these subcategories of natural resources. They will also need to know what is means that a resource cannot be replaced (once we use it all up, there will be no more of it for us to use). The biggest misconception that students will most likely have coming into this lesson is the belief that all resources can always be replaced. They will most likely not be aware of the fact that the environment gives us natural resources that can be replaced but also natural resources that cannot be replaced. The students’ imaginations will be captured by the popcorn activity. We will use this activity to simulate how non-renewable resources get used up by older generations so that eventually there is none left for the younger generations. Since we cannot show this to students use real situations and natural resources, so the students will use their imaginations to connect the popcorn with non-renewable natural resources.
NJ Standards:
6.6.E.1 Describe the role of resources such as air, land, water, and plants in everyday life.
Objectives
Students will be able to name resources that are renewable and non renewable
Students will be able to distinguish between renewable and non renewable resources
Assessments
Students will form a list of examples for both renewable and non renewable resources
Students will successfully complete the sorting activity
Hook: For the hook of this lesson, we will first review what we learned in the previous lesson to make sure the students will be able to comprehend today’s lesson. We will ask the students to help us to make a list of natural resources to give us a definition of this. I will then write 2 different natural resources on the board; one will be renewable (trees) and one will be non-renewable (oil). Then I will ask the class to help me figure out what the difference between the 2 is. We will say that they are both natural resources, and some answers we may get include that they look different, they are used for different things, etc. If someone does not mention that trees can be planted again once we cut them down and oil cannot, we will tell the students this. We will say that trees can be replaced but with oil, once we use all of it up, there will not be any more left. Here we will introduce the terms renewable and non-renewable resources and tell the students that this is a part of natural resources that we will be learning about today. We will draw a map on the board to help with the visualization of this topic. The top of the map will say resources, then there will be 2 arrows coming from resources and going to natural and man-made. Then under natural there will be 2 more arrows coming from this and going to renewable and non-renewable.
Activities, Questions, Examples, and Groups: To begin the lesson, we will bring the students down to the carpet. We will call them down based on who is sitting quietly and ready. The students have assigned seats on the carpet. Once they are sitting correctly and quietly, we will do the hook of our lesson. After the hook, we will talk about some examples of both renewable and nonrenewable resources. First we will ask the students to give us some of each, then we will give the students examples and have them try to figure out if they are renewable or not. Then we will talk about how the renewable resources we listed are replaced. For example, we will talk about the water cycle, growing trees, decomposition that forms soil, etc.
Now we will move on to a demonstration of how non-renewable resources work in order to help the students really visualize the concept and understand how it works. In a hat, we will have slips of paper with the numbers 1 – 5. Each student will take a turn picking a number out of a hat. We will explain that these are the generations: students with the number 5 can be themselves; students with the number 4 are the parents of the group 5 students; students with the number 3 are the grandparents of the group 5 students; students with the number 2 are the great-grandparents of the group students; and students with the number 1 are the great-great grandparents of the group 5 students. We will then bring out a bowl of popcorn. We will explain to the students that for this activity, the popcorn is a non-renewable resource. We will tell them that since the students with number 1 are the oldest, they will get to take the popcorn first. At this point, all of the students with the number 1 will get to go to the bowl and take as much popcorn from it as they want. After the number 1s are done, all of the students in the number 2 group will get to take as much popcorn as they want. This will continue for the students with number 3 then 4 then 5. By the time we get to the students who had the number 5, there will either be no or very little popcorn left. We will then connect this to non-renewable resources and explain to the students that this is what happens when we use as much of our non-renewable resources as we want. Eventually, in the generations that follow us, we will run out of the resource and then no one will be able to use it anymore.
Closure: For the closure of this lesson, we will assess the students’ comprehension of the difference between renewable and non-renewable resources. Just like the previous day, we will make 2 columns on the board: renewable resources and non-renewable resources. We will then have the students pick names and pictures of natural resources out of a bag. Each will be attached to a magnet and the students must stick the natural resource on the border correctly under either renewable or non-renewable and explain why the column they chose is the correct column to put the resource in.
Materials: whiteboard, a hat (to pick the numbers out of), slips of paper with the numbers 1 – 5, popcorn, large bowl, pictures of both renewable and non-renewable resources
Individualization: In this lesson, the popcorn activity will provide a lot of chance for individualization. This activity will appeal to all learners. We will explain how this is related to non-renewable natural resources for those we learn from listening. It also shows them how it works with the popcorn for visual learners or hands-on learners. The bodily-kinesthetic learners will appreciate how this is an active activity. The sorting activity we use for our closing is also very hands-on and visual.
Follow-Up Activities: Future lessons after this should focus on how to conserve and preserve this natural resources. Now that the students know that some natural resources cannot be replaced, we will be more successful in getting them to understand that we cannot waste these resources and have them think of ways to save them. We could also follow up with recycling. Another thing we could do after this lesson is teach more in-depth lessons on some of these natural resources. For example we could do a lesson on trees or a lesson on water where we teach the students what uses we have for it and how we can conserve it.
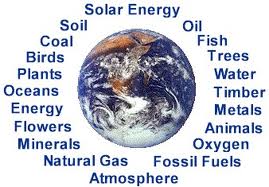 Topic: The topic of this lesson will be the environment and resources. We will focus on what we use from the environment and the distinction between natural resources (from the environment) and man-made resources.
Rationale: Our environment and its resources is a very important topic because both are dwindling due to our inability to take care of our planet. The students need to understand that we get many of our resources from the environment so it is vital for us to keep it clean and prosperous otherwise we will suffer the consequences of our carelessness later on. This lesson is a great start to get us toward reaching that goal. Students do not yet understand how all of their belongings and necessities are made or where they come from so they are not aware of the importance of keeping them. Once they understand that we have natural resources that come from the environment they can be more conscious of their actions that can damage this.
Prior Knowledge: The students will have to have an understanding that we get some (but not all) of our resources from the environment. They will also need to have a general idea of what kinds of resources come from the environment and what kind people make. There are many possible misconceptions that could be brought to this lesson by the students. They may believe that all resources are man-made and people make everything that we use – that resources do not come from the environment - or they may believe the opposite and think that all of our resources come from the environment. They may also have the misconception that in order for a resource to be considered natural, it must come straight out of the environment in the way we use it. For example, when we get water for the environment it does not change and we do not manipulate it. However, when we use trees as a natural resource, we can cut it up or shave it down and use it that way. The students may not understand that this still counts as a natural resource. This is also one way the students’ imaginations will be captured. They will need to imagine all the different things we use just one natural resource, like trees, for. It will capture their imagination that this one resource is used for so many things like building things, making paper products, shelter, for burning, etc. This goes for every natural resource because they have many uses and this will capture the students’ imaginations thinking about this. Same goes for imagining all the things a natural resource can be turned into – a tree can become a whole building, or a small piece of paper, or smoke, etc.
NJ Standards:
6.6.E.1 Describe the role of resources such as air, land, water, and plants in everyday life.
Objectives Assessments
Students will be able to name resources Students will participate in making a class list of the resources
that come from the environment. we can think of that come from the environment.
Students will be able to distinguish between Students will successfully complete the sorting activity.
natural resources and man-made resources.
Hook: To begin the lesson, we will write the word environment on the whiteboard and ask the students to tell us everything they know about the word that we just wrote. Once we finish this, we will let the students know that we get things from the environment and nature that we use for ourselves. Here we will introduce the term natural resource.
Activities, Questions, Examples, and Groups: To begin the lesson, we will bring the students down to the carpet. We will call them down based on who is sitting quietly and ready. The students have assigned seats on the carpet. Once they are sitting correctly and quietly, we will do the hook of our lesson. Next, we will show the class some natural resources that we have brought in (trees/wood, water, soil, air, sunlight, etc.) and for each one we will talk about why it is a natural resource (where in the environment we find it) and what we use it for. For example, for trees/wood, we would talk about how we find it in forests or growing in other places and make a list of things we use it for like to make paper, to burn fires, to build things, etc.
Next in the lesson, we will ask the students if they know anything about resources we do not find in the environment. We will ask for any examples they can think of. Then we will explain that these are man-made resources and explain this more in-depth by telling the students that the resources we have that are not found in nature are made by people and these are called man-made (or synthetic) resources. We will now ask the students to come up with more examples now that they know the full definition of the word. We will have some examples of our own that we have brought in. For some of these man-made resources, we will investigate how they are made and what resources they require in order to be made. For example, a school desk may be made up of wood, metal, glue, nails, plastic, etc.
Closure: We will use the closure of this lesson to assess the students’ comprehension of the topic. On the whiteboard, we will make 2 columns: natural resources and man-made resources. We will then have a bag filled with pictures and names of various resources; each will be attached to a magnet. The students will pick out one of the resources and have to stick it in the appropriate column and then explain to the class why the resource they picked should go in the column they put it in.
Materials: natural resources (cup of soil, water, sticks from a tree, picture of a sun, cup filled with air, etc.) man-made resources (plastic, rubber, glass, metal, etc.), whiteboard, magnets, photos of man-made and natural resources for sorting activity
Individualization: This lesson will require a lot of imagination from the students and this will result in many ways for individualization. In a discussion we will talk about natural and man-made resources for our auditory learners. We will also make lists of the different resources and how we use them for those who life writing and repetition. We will even have examples of both kinds of resources to show the class and help our visual learners actually see these resources and look for the differences between natural and man-made. The sorting activity used for our closure, as well as bringing in the resources for the class to see, will really benefit our hands-on learners.
Follow-Up Activities: After this lesson, the students will have learned that resources can be broken up into natural resources and man-made resources. Future lessons will break down resources even more and teach the students about renewable natural resources and non-renewable natural resources. This will also lend itself very well to some extension lessons on recycling and conservation – the students will need to learn about how to keep these natural resources around so we can keep using them – and ways we pollute and ruin these natural resources.
 Topic: The topic of this lesson will be landforms. This will be the last lesson on landforms before we move on to the next topic of the unit and so we will use this lesson to review and focus on the specific characteristics of landforms and the differences between them.
Rationale: This lesson will be the last day we spend on landforms. Therefore, we would like the students to review everything they have already learned on this topic and present what they have learned in their expert groups to their classmates.
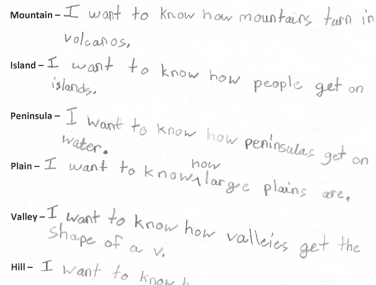
Prior Knowledge: For this lesson, the students will need to use all of the prior knowledge they have gotten from their previous lessons on landforms. Some misconceptions the students may bring to this lesson could include them not knowing that landforms are not just the ones that are famous, they also include landforms that are in their own area. They may also believe that each landform may only look a certain way and there is no variation in their appearance. For example, a lake must be a circular shape and a river must form in a straight line. They may not realize that lakes can be odd shapes not just circles and that rivers can be windy or crooked and are not always completely straight. In the activity where the students must include a picture of the landform somewhere in the written name, they will definitely have to rack their imaginations to think of ways they can incorporate a picture into their written words.
NJ Standards:
6.6.B.1 Describe the physical features of places and regions on a simple scale.
6.6.B.2 Describe the physical and human characteristics of places.
Objectives
Students will have sufficient knowledge of each of the landforms we have discussed so far in the unit.
Assessments
Observe the students while they complete the expert groups and present their findings.
Hook: I will present to the students some exemplary work that we saw yesterday and encourage their good behavior. I will tell the students that they will have fifteen minutes to finish up their expert groups.
Activities, Questions, Examples, and Groups: To begin the lesson, we will bring the students down to the carpet. We will call them down based on who is sitting quietly and ready. The students have assigned seats on the carpet. Each group will have time to finish up their expert groups. Then each group will present to the rest of the class on their landform. For the presentations, each student will talk about what they learned about their landform from doing their specific job. We will guide their presentation with questions. To present the illustrator for example, will talk about the picture they drew (most likely of the landform) and talk about the specific details of the landform that they included in the picture.
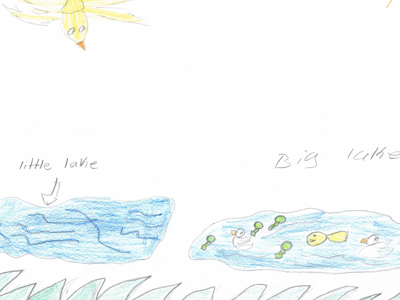
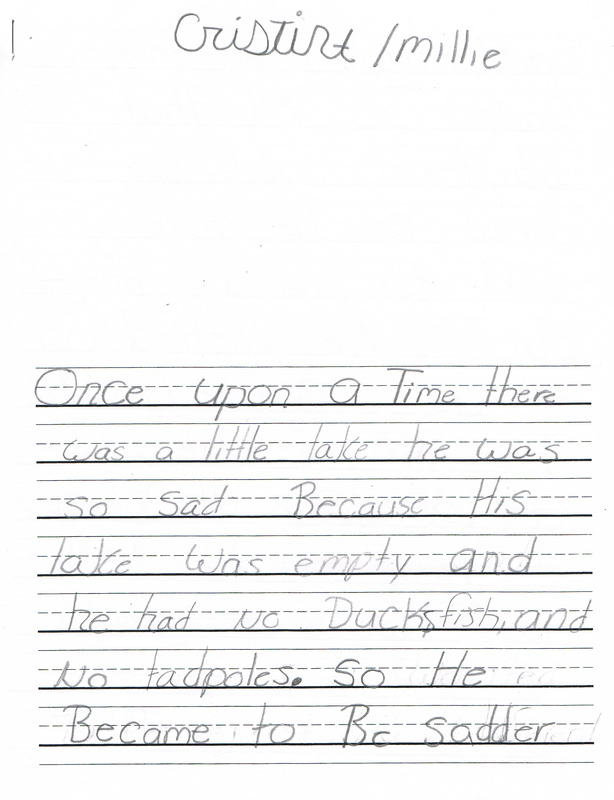
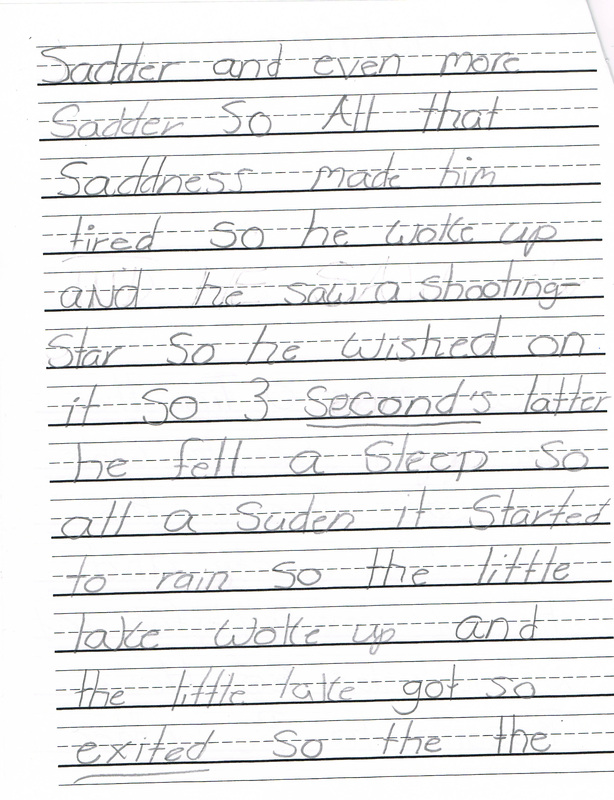
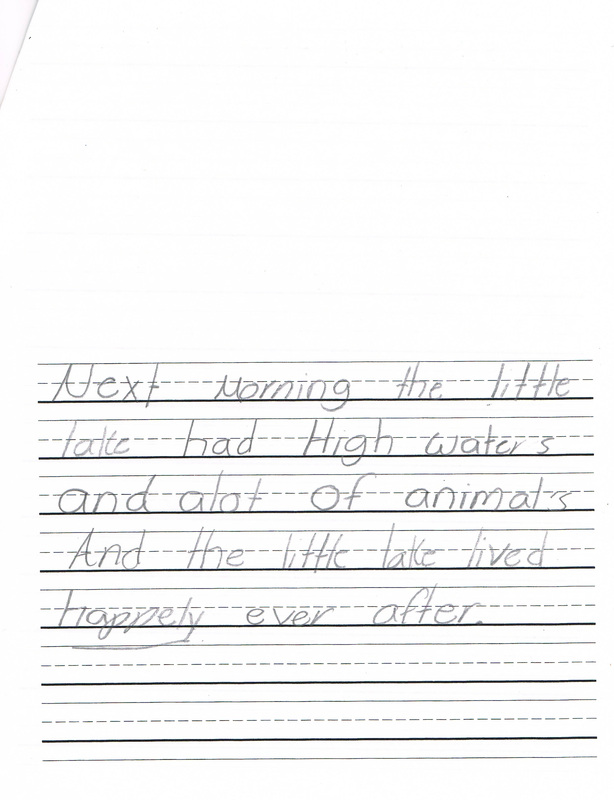
Closure: Once the students are sitting quietly at their desks, we will give each student a blank sheet of paper and ask them to draw the landforms in their names. This is essentially drawing the landform in the letters that make up its name. (See picture)
Individualization: See about expert groups from Day 2.
Follow-Up Activities: This is the last lesson on landforms so a follow-up lesson could include more review and could also use a written test to assess the students. Extension lessons or activities could focus on how we use these landforms (water from rivers, mountains as shelters, etc.) and some things we could do to make sure these landforms are preserves (not polluting water, stop knocking down landforms like mountains to build on the land, etc.)
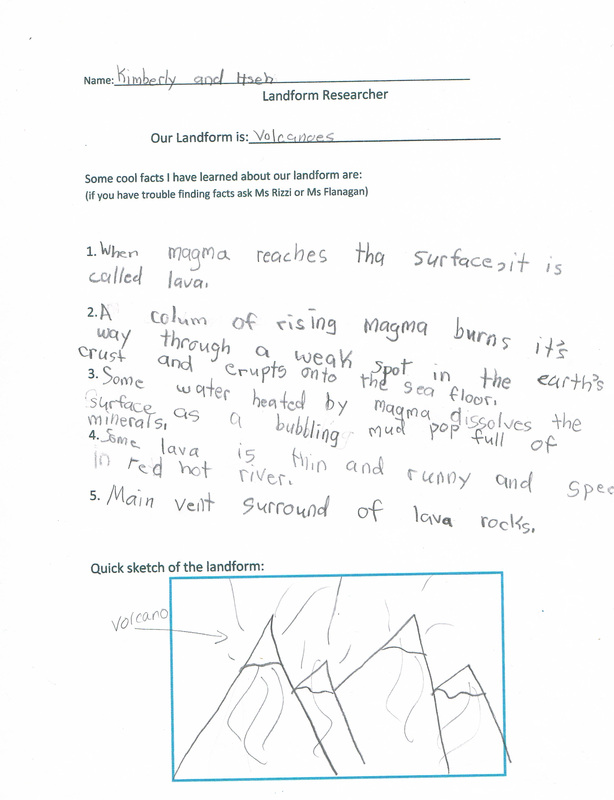
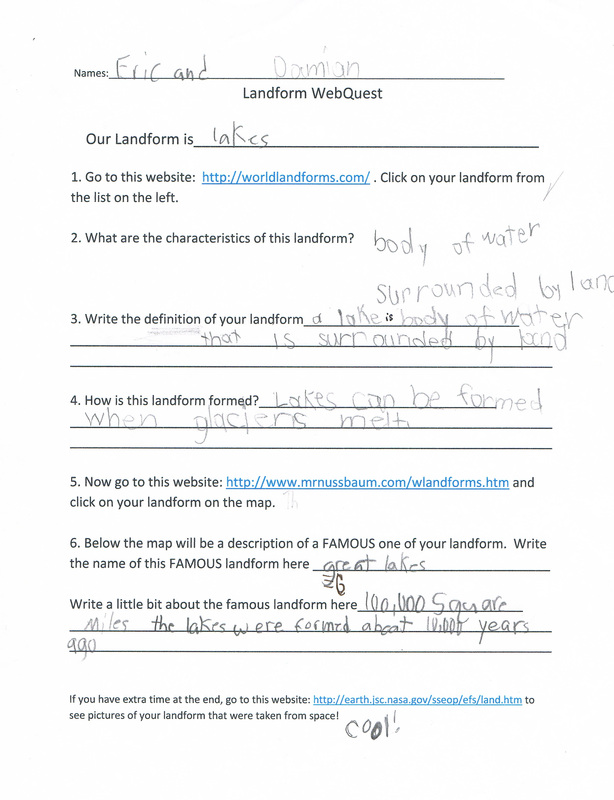
Student Work:
 Topic: The topic of this lesson will be landforms. Since the class has already had a previous lesson on the subject, this one will be more in-depth and focus on more specific details of individual landforms via expert groups.
Rationale: Experts groups are a great way to get students to delve deeper into a subject and find out more than just their general information. It would be unreasonable to expect every student to become an expert on every landform we learn about; however, with this lesson it allows all of the students to become “experts” on at least one of the landforms we go over. This way, they have a general understanding of all landforms and can identify them, but there is one landform in particular that they can gain a lot more knowledge on and realize that the subject can go much further than just what the landform looks like. This is true for all subjects. It can be very difficult for teachers to decide how far into a topic they want to go and how far they can go based on time constraints, supplies, and the abilities of the students. This lesson allows some in-depth work without taking away from students’ properly learning about other parts of the topic or sacrificing any other learning. It also allows students to collaborate and share interesting information with each other.
Prior Knowledge: Before this lesson, students will need to know the various names of specific landforms and general information on each of them including what it is, what it looks like, the name for it, etc. Some misconceptions students may have could include thinking that landforms were just always a part of earth and they will always be here and stay the same. They may not realize that the earth is changing and some landforms are forming, like new rivers and valleys, while others are going away. They also may not believe that a landform can also be a habitat and that others live within landforms. For example, bodies of water are the homes for many different kinds of animals, especially fish. The students’ imaginations will be captured by this lesson with the many supplies and techniques they will be provided with for their expert groups. They will be able to do research online, read books, draw pictures, etc. so that each student will really feel like they are getting to know their landform well. They will be seeing their assigned landform as more than just a piece of the earth; they will know about the animals that live there, how they were made, etc. and this will help them to feel like they are almost a part of the landform and imagine themselves being very close with it and knowing all about it. The landform is almost like a character from a story that the students are getting to know and imagining in their heads.
NJ Standards:
6.6.B.1 Describe the physical features of places and regions on a simple scale.
6.6.B.2 Describe the physical and human characteristics of places.
Objectives
Students will become “experts” on their assigned landform.
Assessments
Students will make presentations to the class on their assigned landforms.
Hook: For the hook of our lesson, I will model for the class what the expert groups should be doing and what their presentations should look like. I will pick one of the other landforms we went over that was not assigned to a group and do all the jobs/parts in the expert group. I will show them an illustration, do some research on famous examples of our landform, find out about who lives in or near our landform, etc. and present this to the class. This way, the students will have a better idea of what they should be doing because we are modeling it for them.
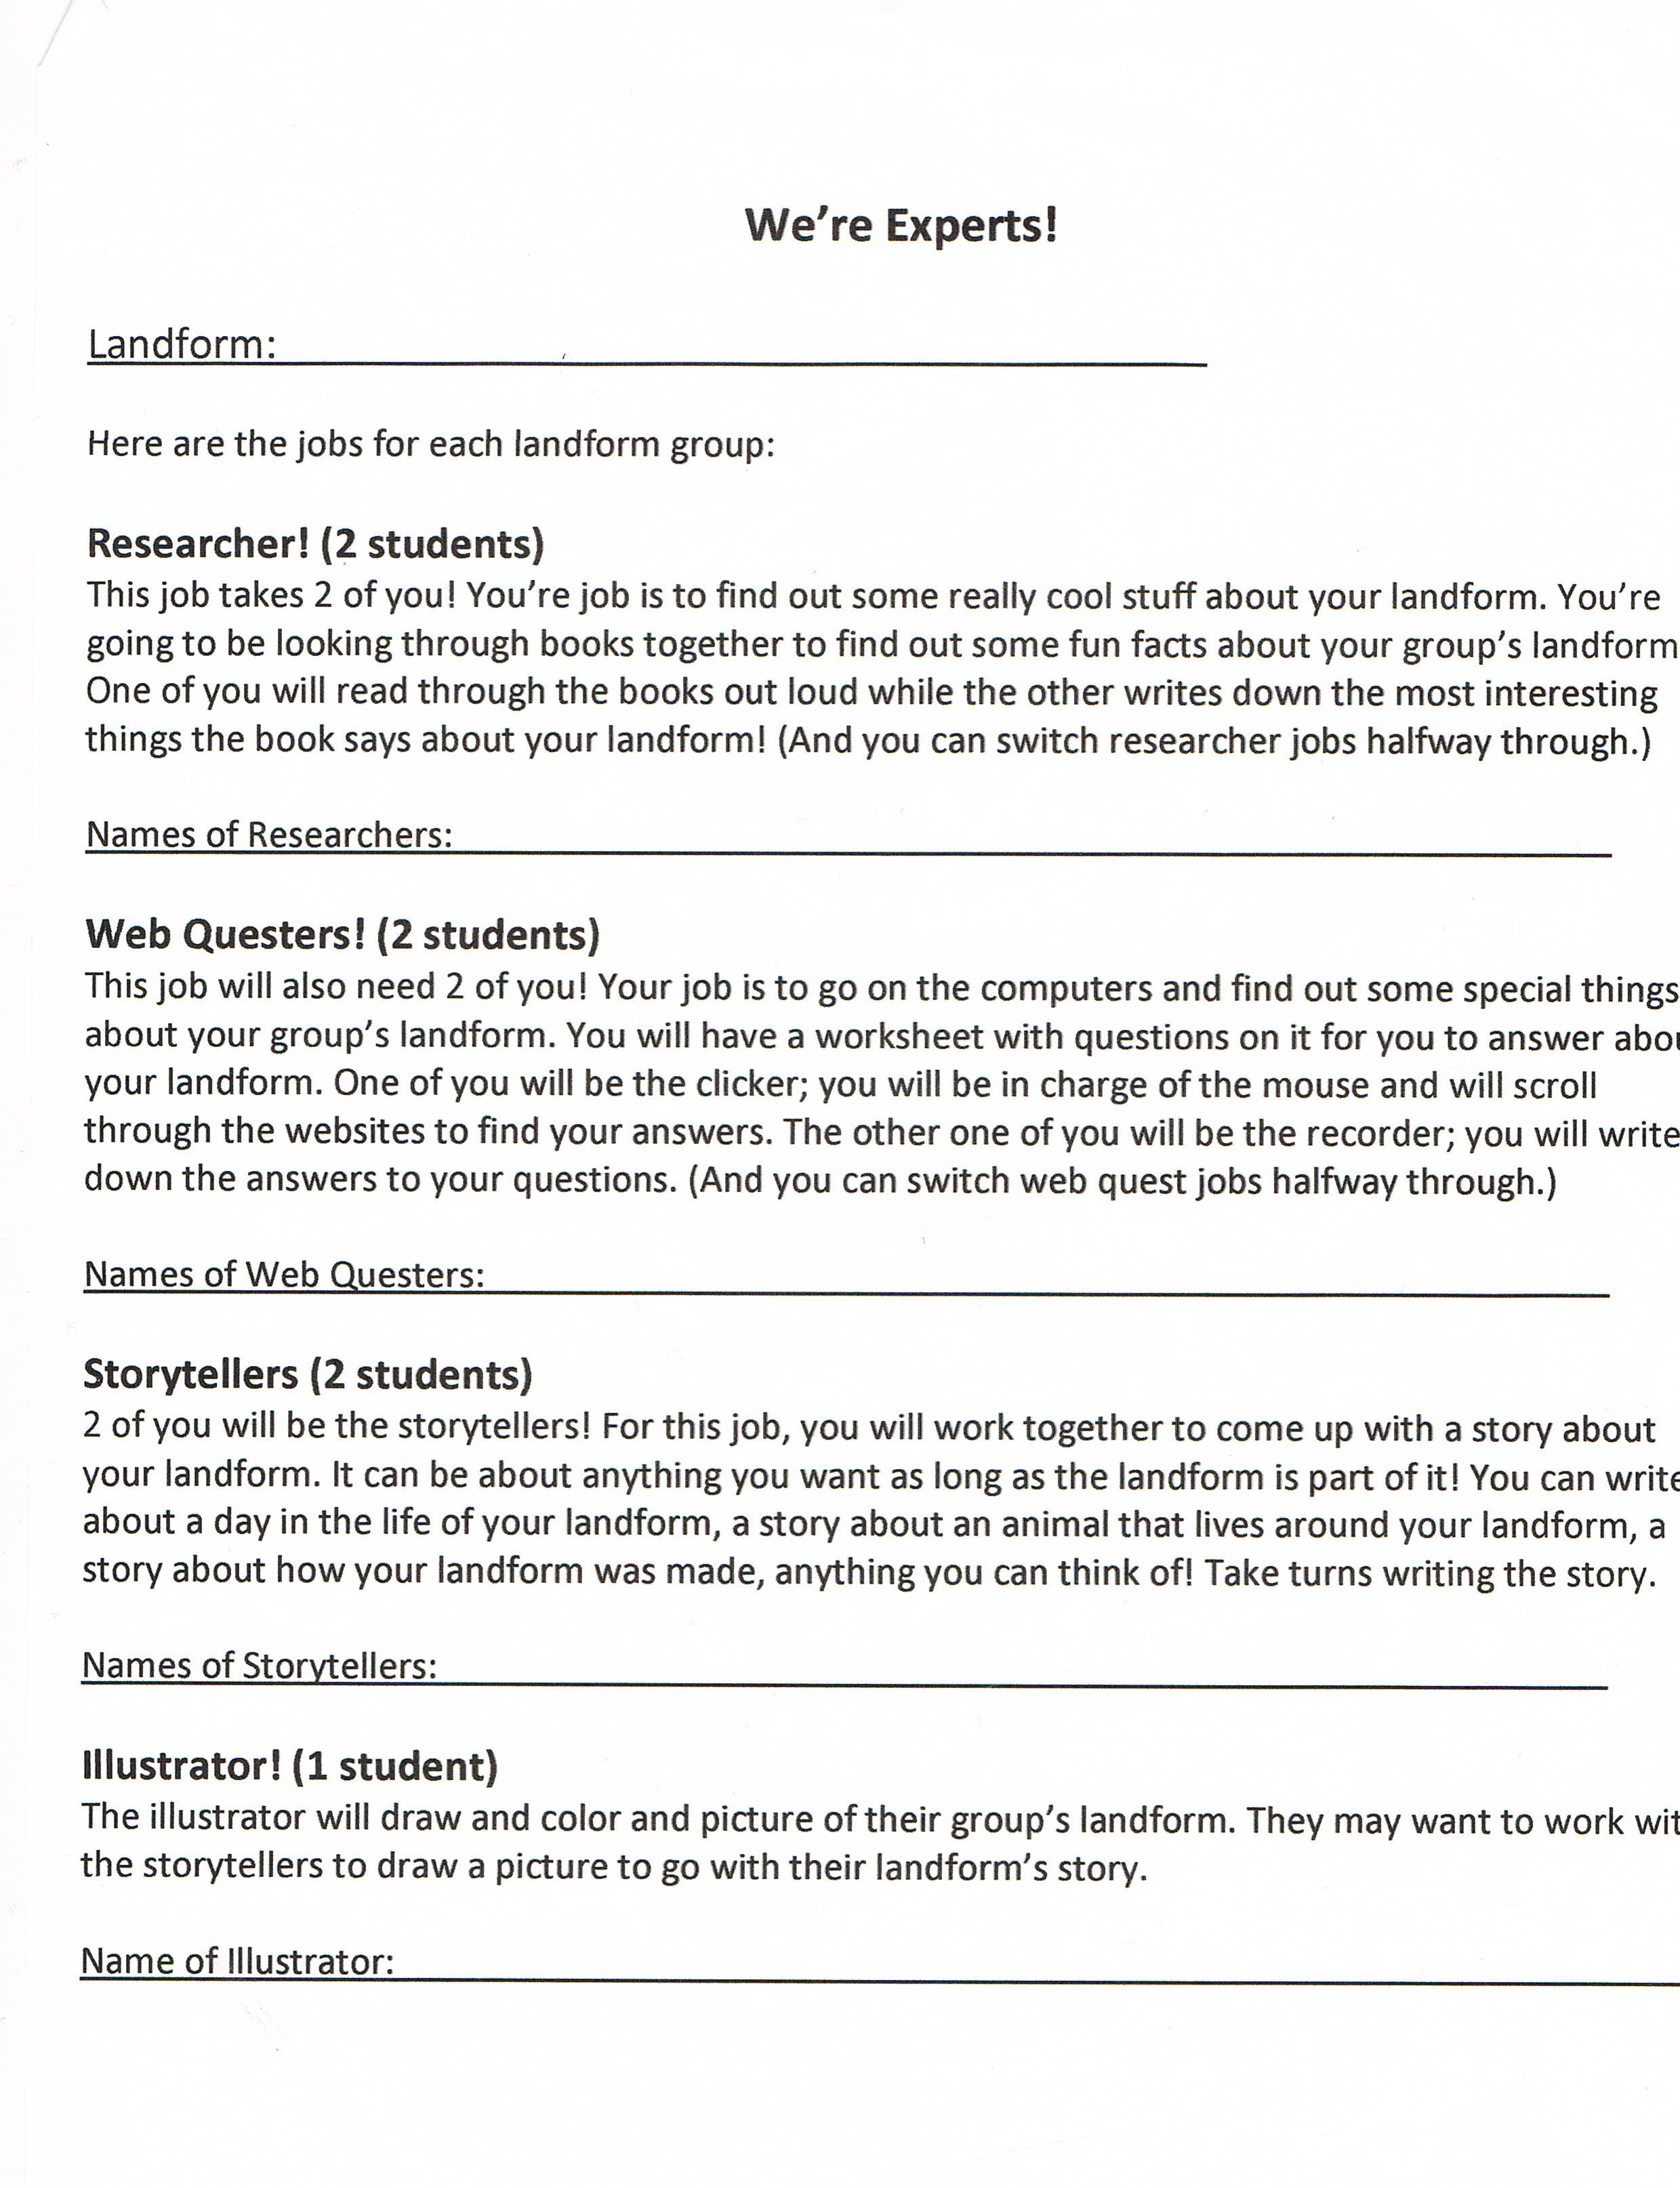
Activities, Questions, Examples, and Groups: To begin the lesson, we will bring the students down to the carpet. We will call them down based on who is sitting quietly and ready. The students will be reminded of their groups and topics from yesterday. Once everyone is settled on the carpet, we will do our hook and then review what is expected of them for the expert group. We will hand out the materials. Then the students will break into their groups and work on each of their jobs in the group. We will go around making sure each member of the group is doing the proper work for their job. See job descriptions in attachment below. We will allow the students time to finish up tomorrow and then the students will do their mini presentations tomorrow.
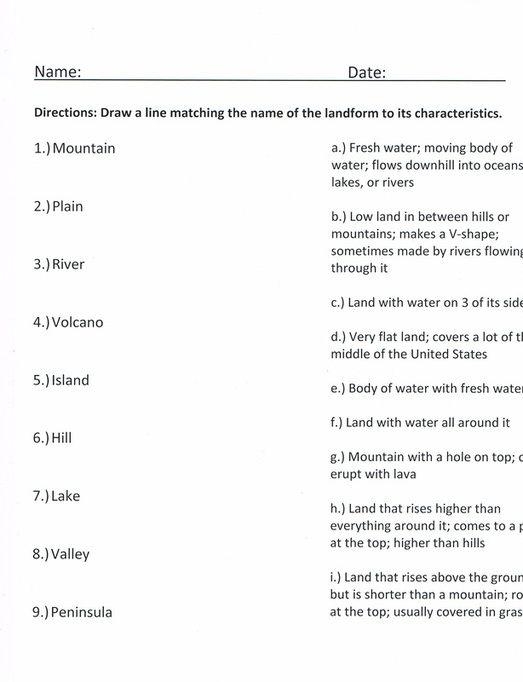
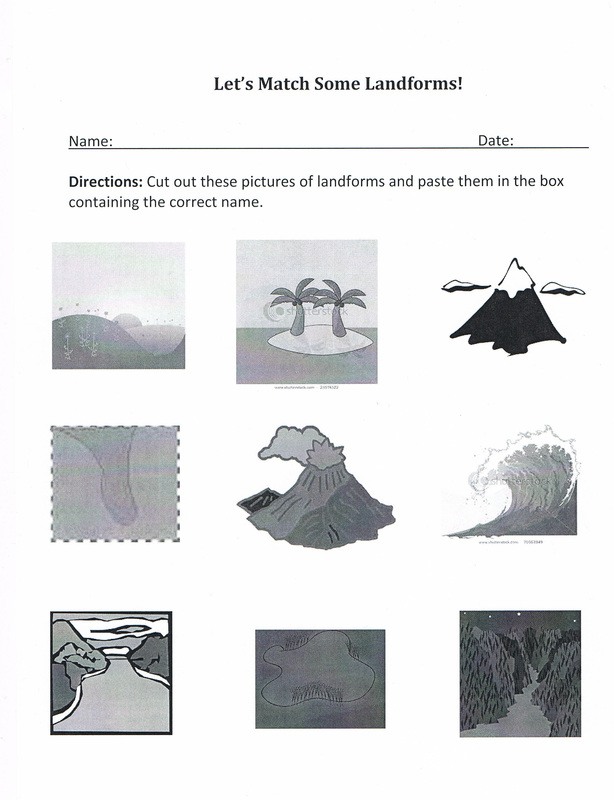
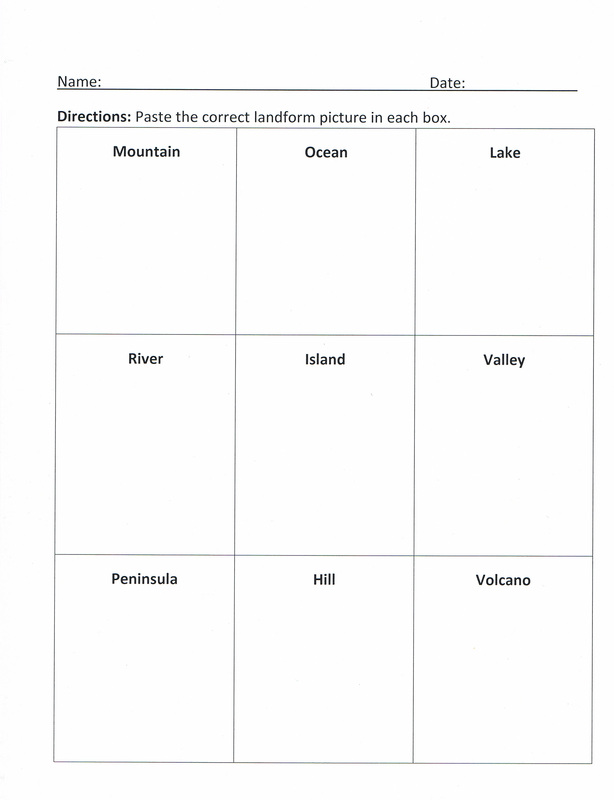
Closure: For the closure of this lesson, the students will complete a worksheet. The students will be given one sheet with sketches of each of the landforms they have learned about. They will cut out all of the pictures. On another worksheet will be the names of the various landforms and a space for the students to glue the pictures they cut out from the other sheet. This will serve as a quick assessment for us to see if they can correctly identify landforms based on their pictures.
Materials: a computer with internet access, books on specific landforms, landform closure worksheet, blank paper, scissors, glue, crayons and markers
Individualization: This lesson provides a lot of room for individualization. To start, we explain how the expert groups work for the auditory learners who learn by hearing lectures or explanations from teachers, we have a worksheet explaining the jobs of the expert group for students who like to be able to read and comprehend at their own pace and like to go back and reread instructions, and we are even modeling the expert groups during our hook so that our visual learners and our learners who learn things by seeing them will be able to easily comprehend the lesson. Within the actual expert groups, every student will have a different job so they can work on a part of the group that is conducive to the way they learn. For example, a student that is a visual learner can do the illustration job and students that are not visual learners do not have to worry about learning about their landform in this way. Students who like writing things down in order to learn them can be the researchers and copy information from the websites we provide them to look up information on their landform. Students who enjoy reading to learn can be the readers in the expert group who read books that deal with their landform. There are many opportunities within this lesson for individualization.
Follow-Up Activities: Students will get additional time to work with their expert groups tomorrow. Future lessons should review what was learned about them such as their names and characteristics that identify each landform. Future lessons should also have students notice landforms that surround them and are in their area. This should allow the students to apply what they have learned about what landforms are.
Resources:
Topic: The topic of this lesson is landforms. It is the first lesson of the unit and so it is an introduction to the topic. We will be identifying nine different kinds of landforms and their characteristics.
Rationale: This lesson will allow the students to learn about the world outside of just their classroom. Most of the time, students are so focused on what is going on within the walls of their home or their school that they do not pay attention to their surroundings. Landforms are something that children should be aware of. They are a part of our planet and so children should be aware of what landforms are and know some specific landforms. Being aware of your surroundings is a very important skill for students to learn and they will begin to gain this skill through this lesson on landforms, which they will then be able to apply to the rest of their lives and build on their observation skills.
Prior Knowledge: For this lesson, the students will need to know a general definition of what a landform is. We will expect the students to already know what a landform is so that we will be able to teach them about specific landforms (river, mountain, island, valley, etc.) Some misconceptions the students may have coming into this lesson are that landforms only include famous landforms and not the simple ones that surround them such as lakes and rivers in their area. The biggest misconception students will have is that the term “landforms” only applies to things on land. They may not realize that things like rivers and lakes can also be considered landforms. Their imaginations will be captured by trying to picture these landforms in their head and think of places they know where they can see these landforms.
NJ Standards:
6.6.B.1 Describe the physical features of places and regions on a simple scale.
6.6.B.2 Describe the physical and human characteristics of places.
Objectives
Students will be able to identify and name landforms.
Students will be able to identify the characteristics of specific landforms.
Assessments
When shown a picture of a landform, students will identify its name.
When shown a picture of a landform or told its name, students will be able to list the characteristics of that specific landform.
Hook: For the hook of this lesson, we will make a list of all of the landforms students can think of. The class will be down on the carpet and we will have the whiteboard next to us. Students will raise their hand and we will call on them one by one to give us an example of a landform. We will write these on the white board. We will repeat this until the students cannot come up with any more landforms.
Activities, Questions, Examples, and Groups: To begin the lesson, we will bring the students down to the carpet. We will call them down based on who is sitting quietly and ready. The students have assigned seats on the carpet. Once they are sitting correctly and quietly, we will do the hook of our lesson. Next, we will introduce a KWL chart to the class and explain that is a chart we use to write down what we know about a topic and what we want to know before a lesson, and then we revisit it after a lesson to record what we have learned about that topic.
For each of the landforms, we will have a poster with a picture of that landform on the front. On the back of the poster will be the name of the landform and a description of it with a list of its characteristics. We will only show the students the front of the poster with the picture on it. First, we will talk about what we see in the picture and use that to fill out a KWL chart for the landform. Then we will have the students guess what the name of it is. After we have identified the landform, we will turn the poster over and go over its name and characteristics. After that, we will fill in the L column of our KWL chart for that specific landform. We will continue to do this same process for each landform. We will then tests the students’ comprehension by showing the picture-side of the posters again, in a different order, and having the class raise their hands quietly to volunteer the name of the landform in the picture or some details about it that we included on the back of the poster.
Once we are sure that the students are secure in their knowledge of each of the landforms we went over, we will introduce an expert group project to them and explain it to the class. We will tell the class that they will be split up into three groups and that each group will research a different landform that we have chosen for them. Each person will have a different job for their group so that two people are webquesters, two people are researchers, two people are storytellers, and one person is the illustrator. We will simply explain the management and directions of the expert groups today and we will work on the expert groups for the next two days.
Closure: For the closure of our lesson, we will have a discussion on all of the landforms we talked about that day. We will review each landform using the flashcards. Some possible ways we can do this are by showing the class the picture of a landform and asking for the name, showing a picture and asking for characteristics, telling the students a name of a landform and asking for characteristics, or telling the students characteristics of a landform and asking for its name.
Materials: posters of landforms (front will be a picture of the landform and back will be its name and a brief description/list of characteristics), whiteboard, expert group handout
Individualization: This lesson incorporates several different methods of learning for the students. For our visual learners, the poster flashcards will be very helpful. They will be able to see what the actual landform we are discussing looks like and get a real-life picture of it, instead of just hearing it described. It will also help them to see the name of the landform and its characteristics in big, clear letters on the back of the poster so that in their minds they will be able to connect this to the picture of the landform that they were shown. For our auditory learners, we will be giving tons of description and having a lot of discussion on the landforms we talk about. If they have trouble with look at pictures or reading descriptions, they will be able to listen to us describe each landform as we go over them and picture them in their mind as we talk about them. For the learners that like writing or reading, the KWL chart and our list of characteristics on the posters will be most helpful for them. They will be able to read the back of each poster to gain an understanding of the landform pictured on the front. With the KWL chart, the students will be able to map out exactly what they know about each landform and exactly what they learned once we go over each one. This incorporates visual learning as well as writing and provides repetition of the concepts we are learning to really instill the topic and its contents within the minds of our students.
Follow-Up Activities: Future lessons on this topic will include more in-depth looks at each specific landform.
|

